

How To Set Up A Front Door Camera
0
How to Set Upwardly a Trail Camera | Perfect Guidelines for Beginner
Terminal Updated on February 2, 2022 by
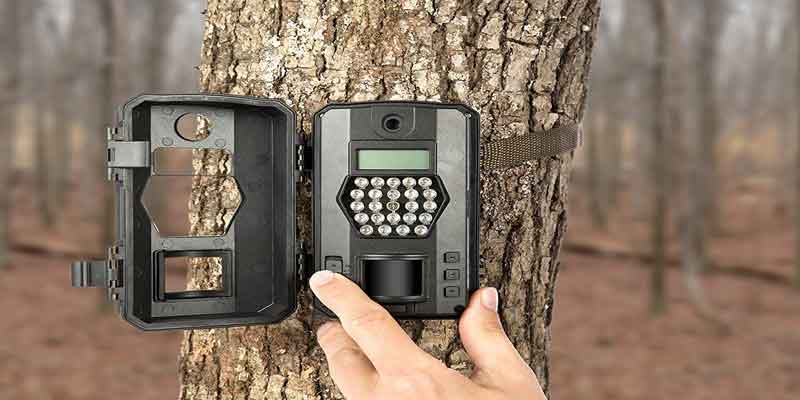
Trail cameras are a worthy treasure for people who love hunting, parenting deer, or wish to accept a look at the animals and people passing by his property. At nowadays, a trail camera is undoubtedly the most popular documenting tool in the market.
This guideline on setting up a trail photographic camera will come in handy for beginners with invaluable tips for setting up trail cameras without much fuss. Nosotros take tried to cover all the famous and available models out in the market, so the users won't have to look for their specific models somewhere else.
Quick Navigation
- one How To Gear up A Trail Photographic camera (Tips & Guide)
- 1.1 How to Set up upwards Simmons Trail Camera?
- ane.2 How to Setup Tasco Trail Camera?
- one.3 How to Setup Bushnell Trail Photographic camera?
- 1.4 How to Setup a Moultrie Trail Camera?
- 1.5 How to Setup A Wireless Trail Camera?
- one.6 How to Set Upward A Cellular Trail Camera?
- 1.7 How to Set Up a Tasco 8mp Trail Camera?
- 1.viii How to Ready Up A Stealth Cam?
- 1.9 How to Ready Up Bushnell Trophy Cam?
- 1.10 How to Gear up Wildgame Innovations Trail Camera?
- 2 Conclusion
How To Set Upward A Trail Camera (Tips & Guide)
Last Update on 2022-04-x / Affiliate links / Images from Amazon Product Advert API
How to Ready Simmons Trail Camera?
Simmons is formerly famous for its easy installation of trail cameras. The process follows
1. It would assistance if y'all chose a identify where there are no obstacles, such as trees and branches in front end of the camera. Moreover, don't place the camera facing east or west to avoid sunlight. Furthermore, the photographic camera needs to exist mounted nearly iv-5 feet in acme from the ground.
At start, insert the straps in the rear housing and so wrap it around the mounting surface. Lastly, secure the photographic camera past tightening the buckles.
ii. Now printing the 'On' switch, and the camera will get-go. The PIR sensor will immediately be useful to locate any moving objects and capture those photos and videos. If the photographic camera isn't responding, check for the batteries and memory card whether they are in good shape.
3. As the photographic camera is ready and PIR sensors are working correctly, it's a good thought to check the coverage expanse. You might move the camera angle slightly to adjust the coverage area. A Simmons trail camera is capable of using its sensors upwardly to 13m approximately.
iv. Finally, insert a professional theft lock to deprive the probable thieves and secure your camera.
How to Setup Tasco Trail Photographic camera?

We congratulate you on buying probably one of the best trail cameras. Now, permit's check on how to install it-
1. Identify the power switch in the 'AIM' position and wait until the display turns on. Sometimes, it may show 'Status Led,' but at that place's zilch to worry about since it is normal.
two. Now, press the on switch for the second time and permit the display to flash. Use the 'upwards' and 'down' keys to change the default setup according to your choice.
three. Earlier leaving the procedure, don't forget to salvage the changes. To relieve changes, press the 'ok' push button in one case.
4. Similarly, using the up and downward button and shifting to a unlike menu, you can ready upwardly the date, time, photo style, number of photos taken, etc.
5. As you finish the settings, mount the camera in a user-friendly place. Lastly, bank check the sensors, altitude, and shooting angle to get the best view of animal trails.
Related Content: Tasco Trail Camera Review
How to Setup Bushnell Trail Camera?

Bushnell trail cameras take digital photos and videos of moving animals with their high-definition camera to provide precise documenting.
1. At first, open the camera from the bag by releasing the latches. And so install the bombardment and memory card.
2. Now enter the default countersign '0000' past pressing the 'enter' button four times as you switch on the camera display.
three. After waiting for a while, press the 'enter' button once more to modify the different factory setups according to your likings.
iv. To mount the camera, use the straps to thread it in a secured identify such as a tree. Now tighten the buckles so that it aims correct in the direction you want.
v. At present switch on the camera and move fast from its sensors if you don't want to capture Bushnell'south 1st capture. Y'all will become 60 seconds to walk abroad.
Related Content: Bushnell Trophy Cam HD Review
How to Setup a Moultrie Trail Camera?

If you wish to get accurate readings, the camera setup must be in social club.
1. Survey the camera location and mount the photographic camera in a secured place away from thieves and animals.
2. Insert a memory bill of fare and batteries by opening the battery place. To do so, you will have to remove the screws to open the battery door.
iii. Once you install the card and battery, tighten the photographic camera with a tree, preferably using Velcro or a stable strapping.
4. Adjust the camera angle to capture the animal trail and make certain the sunlight doesn't buss the brandish direct.
5. Lastly, turn on the camera and keep pressing the 'automatic' button until the brandish turns on. Information technology is the default setting for a reckoner screen.
Read This: Moultrie game camera troubleshooting
How to Setup A Wireless Trail Camera?

Wireless trail cameras are of great use since you can monitor them sitting in the cozy corner of your abode through the internet. The installing of a wireless trail camera is nothing different from a standard trail camera setup.
At beginning, you will have to insert and install the battery and memory card. Normally switch on display merely like any other cameras and if y'all wish to change the mill settings upon your likings. Since it doesn't apply any wire, you won't have to think nearly hiding the wire. How splendid!
How to Set up A Cellular Trail Camera?
A cellular trail camera is the latest edition in the market and has been enjoying keen hypes. Nevertheless, the hype isn't incorrect since this camera allows us to picket the animals and nature alive. The setup also doesn't vary from the standard trail camera installation. So, it is a keen advantage.
Unremarkably unwrap the camera from the bag, install the battery and retention carte. At present before mounting it in a secured place, connect it with the net to register it online. In one case you are washed with the registration procedure, fit information technology in a tree with a good viewing-angle, and fasten it with a belt or Velcro.
That's it. Now you can enjoy the camera captures from wherever yous want.
Relevant Content: Covert Scouting Cameras
How to Set Up a Tasco 8mp Trail Camera?
Tasco 8mp trail photographic camera successfully holds the record of existence the well-nigh affordable game camera in the market. Despite being a low-budget camera, it captures great photos and videos to assistance gamers understand the animal trail.
The setup follows the standard Tasco trail photographic camera ( Tasco game camera ) setup, and then yous won't need to carp most it. The easiest fashion to structure an 8mp game camera is to advisedly read the user manual and and so follow the steps stated.
You will have to mount, secure as well as prepare the brandish options manually. Reading and following the guidebook volition do great help.
How to Set Up A Stealth Cam?
Stealth photographic camera boasts of having one of the all-time image sensors for detecting and capturing moving objects. Thus, near gamers love stealth cameras, especially their g42ng version. If y'all want to know the in-depth installation procedure on how to set Stealth cam g42ng, we recommend you to follow the below steps-
1. At first, gear up the batteries correctly. It requires 8 AA prison cell functioning batteries.
2. Now install the retentivity card past inserting it into the slot.
3. Turn the power button on.
4. Enter the settings menu in the LCD to adjust the time and date.
v. Press the 'up' and 'downwardly' keys repeatedly to adjust the timing.
6. Repeat the process for fixing minutes, hours, dates, and years.
7. Don't forget to save the changes past pressing the 'ok' button on brandish. Otherwise, all of your progress volition be lost.
eight. When you are done with all the settings, a word is written 'del' will pop up on the screen. It confirms that all of your previous changes accept been saved successfully, and now the device is ready for formatting the retentiveness carte.
9. As you delete the previous images from the memory bill of fare through formatting, keep pressing the 'ok' button repeatedly so that the 'ft' pops upward on the screen. It will blink severely on the screen.
10. Lastly, press the ok push button over again to confirm all your changes while returning to the PIR.
xi. Before y'all get out, printing downwardly the 'menu button. It will permit the camera to take photographs on Preset A, aka factory settings.
At present g42ng stealth camera is all prepare to detect animals' trails to increase your enjoyment during hunting.
Related Content: Stealth Cam Reviews
Related Content: Stealth Cam G42ng Reviews
How to Gear up Up Bushnell Trophy Cam?
Bushnell Trophy cam comes with the Hard disk drive recording facility of any moving objects making information technology a popular recorder. It comes with six keys for a dissimilar setup. Even so, to alter the default setup, you lot will crave to press the 'setup' button first without pressing the 'menu button.
1. When a user switches on the 'setup' manner, he will find four different keys for shortcuts to utilise during the setup.
2. Pressing the 'upwards' primal will allow the camera to capture videos of the games such as deer.
three. Pressing the 'down' key volition enable the Trophy Cam to take all the same photos.
4. If y'all want to trigger the shutter speed, keep pressing the 'right' central button repeatedly until you get your desired shutter speed.
Similarly, you can use the card and setup options to change the default functions. Reading the guideline will exist a smashing aid in this case.
How to Fix up Wildgame Innovations Trail Camera?
Wildgame Innovations trail camera has been the apple of every gamer'south eye since information technology outset striking the market with a bang. It has been serving gamers and wildlife lovers significantly from the very starting time day. Apart from its versatility in the field, the setup is incredibly like shooting fish in a barrel.
1. The first thing comes first. Unbox the photographic camera from the bag and go set up to install and mountain it in a secured identify.
2. Make sure the batteries are fully charged and then install them in the photographic camera.
3. And then, install the memory card in the slot.
iv. Switch on the camera and go to the 'setup' menu to change the factory settings. Pressing the ane push, you volition exist able to change the shutter speed, trigger fourth dimension, date, and time equally well equally flash settings.
five. Once y'all are satisfied with the changes, ostend them before exiting.
6. Lastly, find a secure identify and mount the camera there with a skilful viewing angle to get improve videos and images of the games.
That'south all. Enjoy the hunting session with precise information from the Wildgame Innovations photos.
Related Content: Wildgame Innovations Trail Photographic camera Reviews
Conclusion
Trail cameras are more a necessary tool for hunters and wildlife lovers. Although in that location are numerous game cameras out in the market, luckily, most of them follow a more or less similar installation pattern.
Yet, this in-depth guideline will come in handy for using a trail camera for beginners and experts akin. Then, get, set, go- enjoy your hunt!

How To Set Up A Front Door Camera,
Source: https://trailcamvalley.com/how-to-set-up-a-trail-camera/
Posted by: morgandount1942.blogspot.com
0 Response to "How To Set Up A Front Door Camera"
Post a Comment